
Since my last article where I talk provide tips on shipping prints either flat or in a tube, I had a few questions relating to flattening out prints when shipping prints in tubes. Toward the end, I provide some tips to flatten prints out if they have a tendency to curl. I wrote this post a few years ago however I thought it would be a good idea to re-share as well as update it with some more details.
In my last post Packaging Your Unframed Fine Art & Photo Prints, I needed to address one of the reasons people prefer the flat rigid mailers over shipping in a tube print is, it gives the prints a chance to flatten out. Shipping in a tube simply does not give a paper a full chance to looks something called “roll memory”.
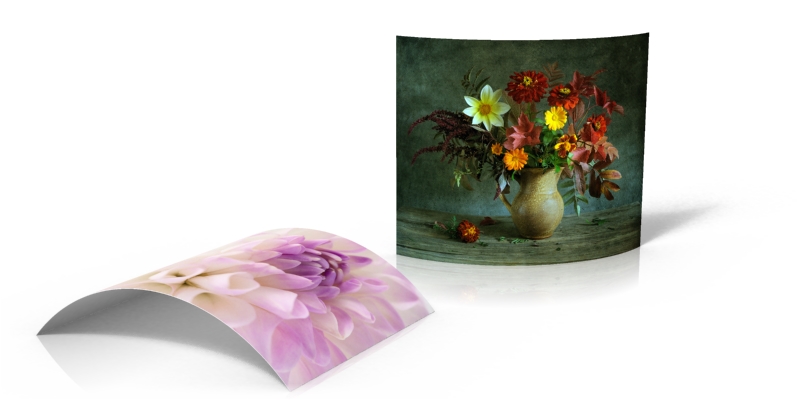
Roll memory is condition in which the paper wants to curl in on itself. So, how could she fix this? We will talk about that in a moment but first we need to understand what causes roll memory.
What is Roll Memory
Just about any type of paper you find will have at one point had been on some sort of roll. This goes for copier paper to papers used for magazines and newspapers all the way to papers used for fine art production.
Usually, the paper is cut down and packaged in reams or bundles. Most of these papers are not too heavy or thick and the core they have been wound over is larger enough that curling or roll memory is almost nonexistent.
With higher end papers, especially for enterprise level fine art and photo printing, the papers are converted to smaller rolls, usually around a 3″ diameter core. These do tend to be thicker papers and in some cases the fibers are more dense therefore the tendency to curl right after the paper has been printed on and cut is much more likely.
Will Shipping Prints Flat Help?
In most cases shipping prints flat will give the prints time to flatten. Note I said in “most” cases. There are times when even that is not enough and the paper needs additional assistance, especially with heaver weight alpha-cellulose based papers that were printed on in an area of the roll which was closer to the core of that roll. Fortunately it should take less time.
Why Not Use Blank Sheets to Print On?
Papers used for fine art giclee printing and your typical photo lab for photo prints usually come in rolls and not be cut until after the print is complete. You will find some exceptions but generally this is the case. Even though some of the papers we use are available in large sheets but they are difficult to feed into a printer and result in a lot of wastage not to mention more costly.
When we start a print job, these rolls of fine art papers are loaded onto spools and fed through the printer at which point images will be printed and then cut from the printer. In our case, the production department has the immense pleasure of cutting these prints out. I say this jokingly since it is tedious and not very fun at times with some of the thicker papers that have less play. Getting those papers to cooperate while being cut is nerve racking to say the least and at times leads to cutting misalignment resulting in the print having to be trashed and redone. Not only do we have to position the paper carefully but so fresh off the printer, the inks have not had a lot of time to cure so even more care has to be taken with those. Prints are especially difficult to manage if the part of the paper the print was made on was closer to the rolls core. And it is not just cutting. If a customer wants those prints shipped flat, packaging is also a challenge since those prints don’t want to cooperate very well.
You will find plenty of online discussions on this topic if you do a simple Google search with variations of the words “fine art photo print curling” so it is obviously nothing new. Photographers especially lament this issue since so many photo labs ship their prints, regardless of the size, rolled in a tube.
What can be frustrating with some of these papers is it simply takes time to lose their roll memory. In most cases the prints will have had a chance to lose that roll memory by the time it get’s to you but how quick can be influenced by a couple things.
Factors that Influences Flattening Time
The size of a print plays a big roll. Smaller prints are lighter but it makes it more difficult for it to flatten out under it’s own weight if on a thicker and denser paper. For instance an 8×10 may need to have something smooth and heavy placed on it. If you plan on shelving your prints as inventory for a later show or other reasons, rest assured that the prints should flatten out over some time even if you don’t place anything on them. You will want to keep them in a warm dry area to maximize this. How long it takes depends on the paper itself.
Temperature and humidity levels will also have an effect on paper. During the cooler times of the year, flattening is much harder. But in general I have always found fine art papers are very susceptible to the environment and becomes less pliable when exposed to cold temperatures. This means the ability to soften up and for it to flatten out may take longer. The easiest solution is to get it in a warm environment as soon as you can and then let them flatten out like mentioned above.
Paper type also plays a role, even with premium fine art brands like Moab which we widely use. If you experiment with the different papers you will find some flatten out with more ease than others. Thicker cotton based papers like to curl more in my opinion and in combination with cooler temperatures as mentioned above, you may have to wait a little longer if your prints have always tended to curl for some time after you received them.
Curling Prevention Techniques
So back to the initial question on how to prevent this. I know some people will recommend using something like a D-Roller which is a device to curl a print in reverse. A D-Roller is a cylinder device with a flat that allows you to roll the print on itself.
Here is a great example of someone with a homemade version of the D-Roller. You could probably do the same with a window shade on it’s roller.
While the D-Roller might be used by professional framers, you can also achieve the same results with a roll of wrapping paper. The idea is the same. Place the print face down, roll it up and keep it rolled for a while. I would probably check it after a few minutes. Just don’t leave a print in too long or you may have the paper wanting to curl up on itself in reverse. Then you will have to reverse the process. I know this has worked just fine for some of our customers who have recommended this or a similar method. Just make sure the print is not cold when you do this. You don’t want the primers under the ink to crack. Here is a link which has an interesting discussion on the D-Roller with different opinions on it’s usage:
http://www.luminous-landscape.com/forum/index.php?topic=32872
One of my favorite methods is simply to take a hot iron without any steam (you don’t want the steam to damage the print). Please the print between two sheets of plain kraft paper or other clean paper without any printing on it. Experiment with a lower temperature at first and be careful to not burn your print by keeping the iron on it too long. Keep the printed part face down so the inks are not directly exposed to the heat. The idea is to warm up the print in the process but not to cook it. I have heard of a lot of artists and photographers using this method so I tried it once myself. It worked out great. It also works well on unmounted canvas prints which have been creased during handling.
The bottom line is print curling can be fixed. They will eventually flatten out on their own since they are no longer under the pressure of being rolled. Usually by the time they arrive to you they will have flattened out but during the colder months you may need to give them a little help. Feel free to share your ideas by commenting on this post. Perhaps you have found a better method then those mentioned above or a method that might work better for someone else.
I’ve been purchasing your quality prints for 6 years and never had a problem with curling. I always receive my prints shipped flat. Since the fall if 2020, all my prints have been extremely curled, and once removed from the sleeve, nearly impossible to get back in. I do not feel comfortable sending them curled this badly to my customers, so I am not sure why you do. I can’t imagine how difficult this is for customers that order larger volumes of prints. Seems like there should be a process on your end to flatten them after printing. I don’t even know how you get them into the sleeve. Just my 2 cents.
After removing the print(s) and kraft paper from the mailing tube, I turn the print(s) over face down on the kraft paper. Next I place the the mailing tube on top of the prints at one end and carefully roll them backwards using the mailing tube as the roller then taping the kraft paper to hold them in place. I leave them this way for 45 minutes to one hour then unroll them. They now lay flat and are ready for framing.
Thanks Mark for the great tip!