If you have a bundle of vacation photos or other images you want to make into prints on Kodak professional papers, we brought back an updated version of the batch ordering tool for Kodak prints. The batch setup tool allows you to add multiple prints to your shopping cart, all from one screen.
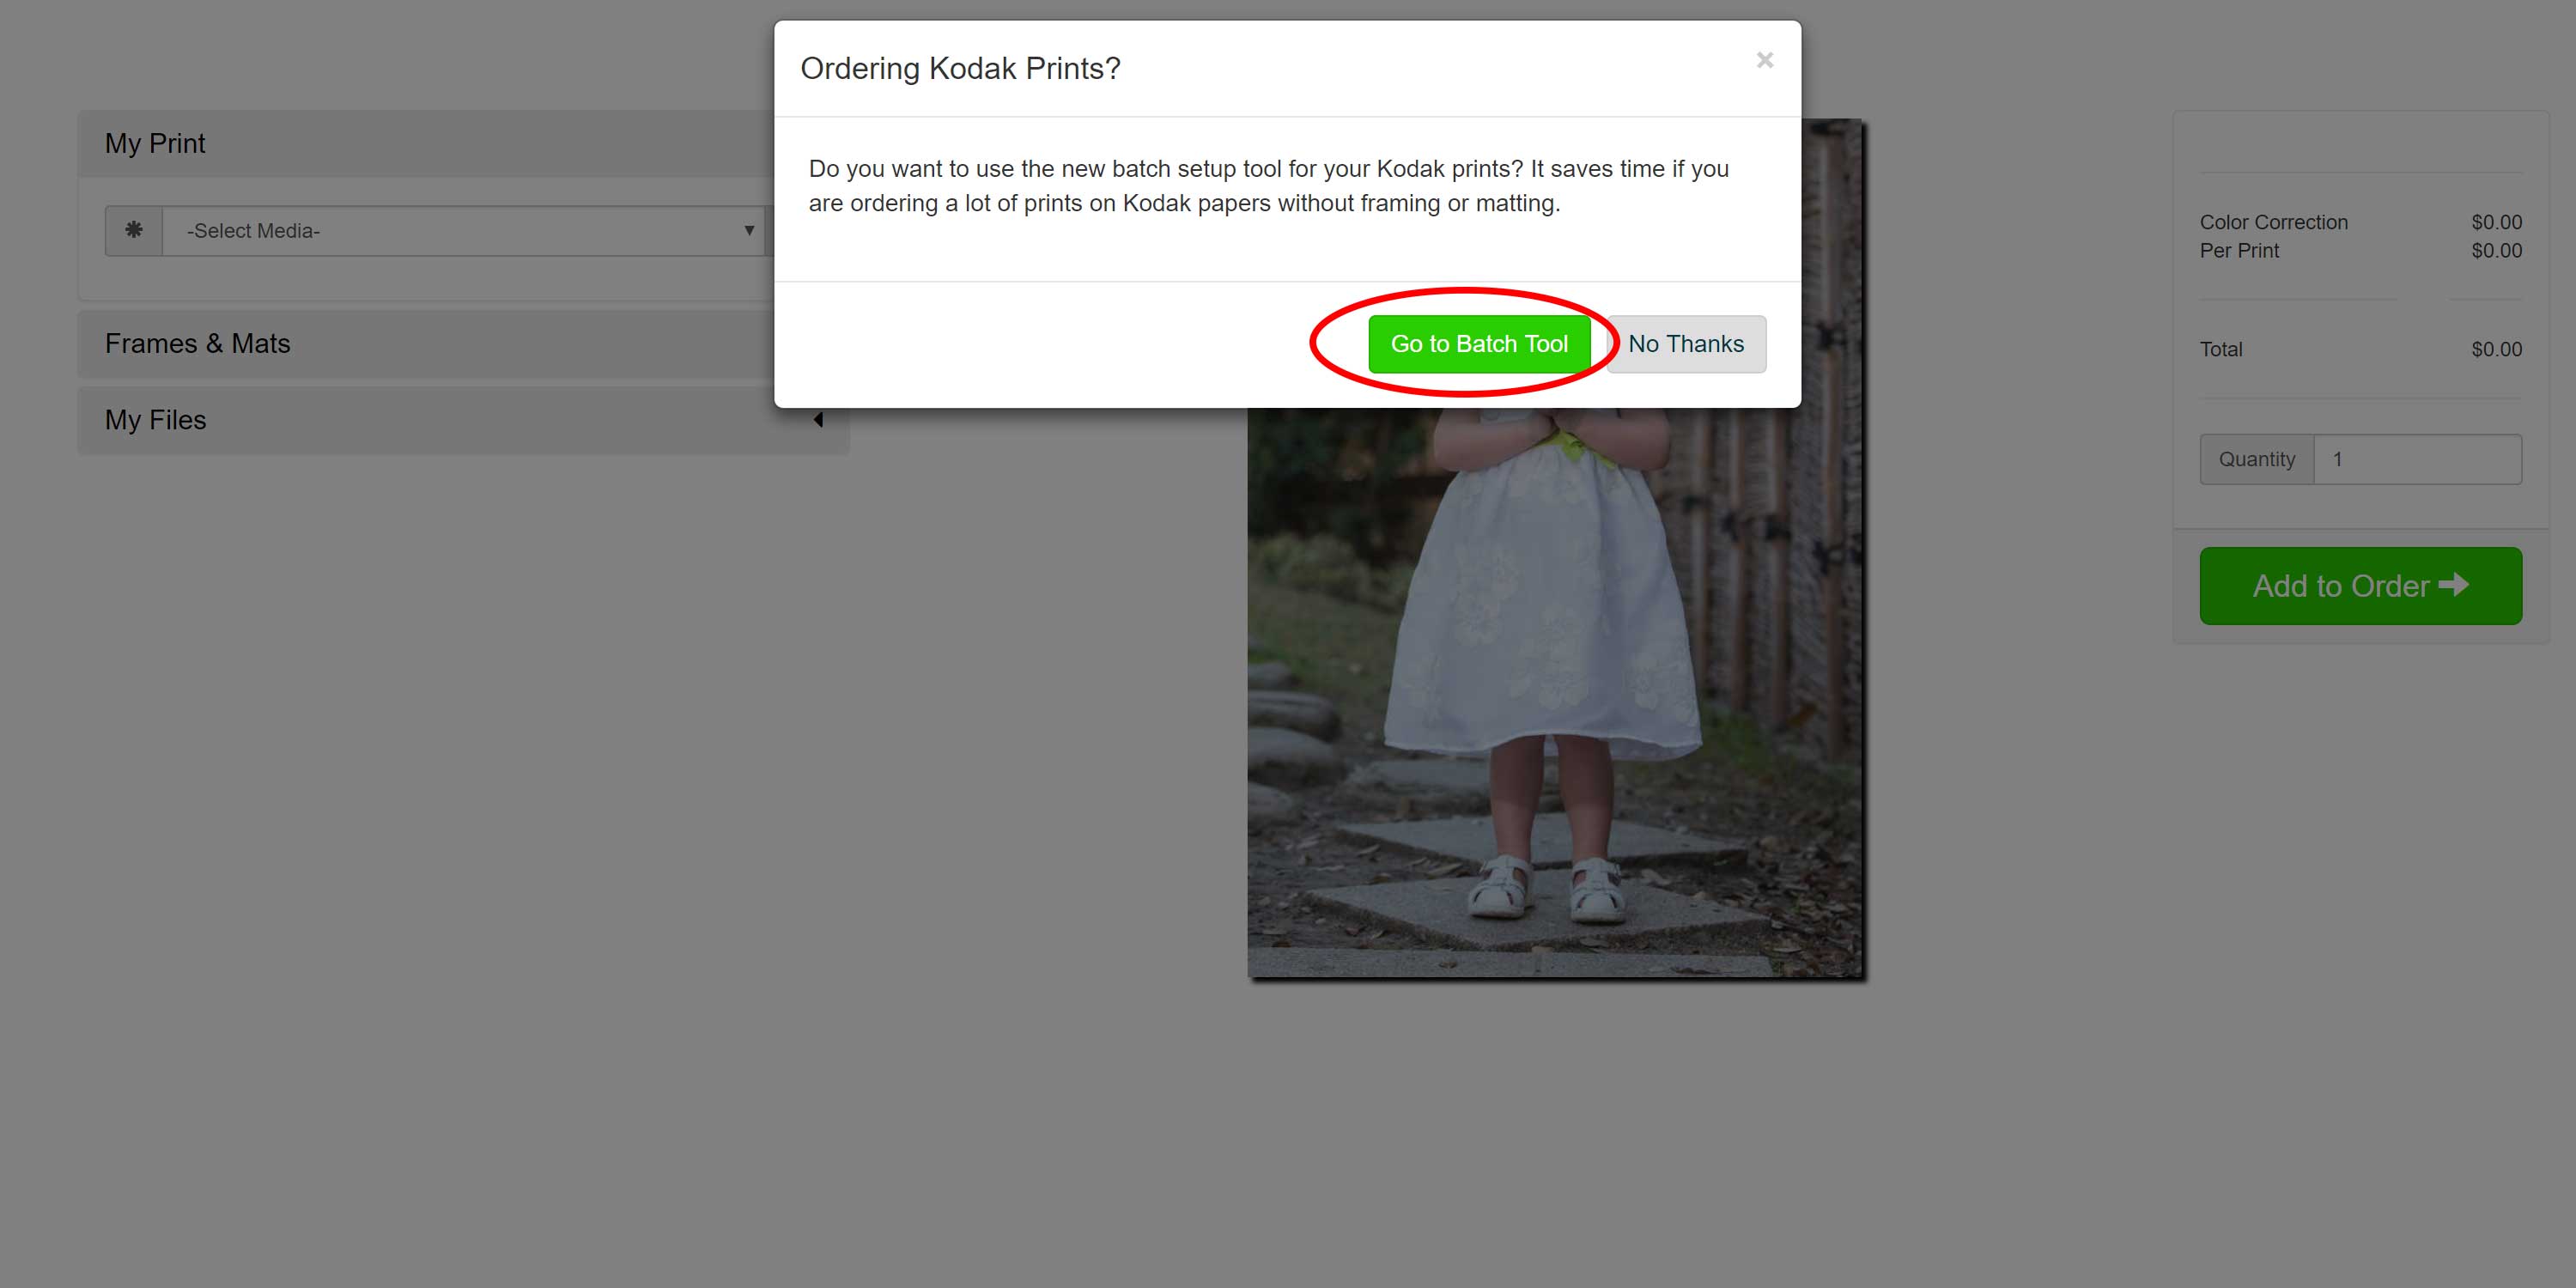
To use this tool, start your order. Select your image and click the “Kodak” prints option. This will take you to the regular order screen where you normally would choose the Kodak paper type and size. A message will show which allows you to go to the batch tool or continue using the normal interface. Below is a walk-through of what this looks like.
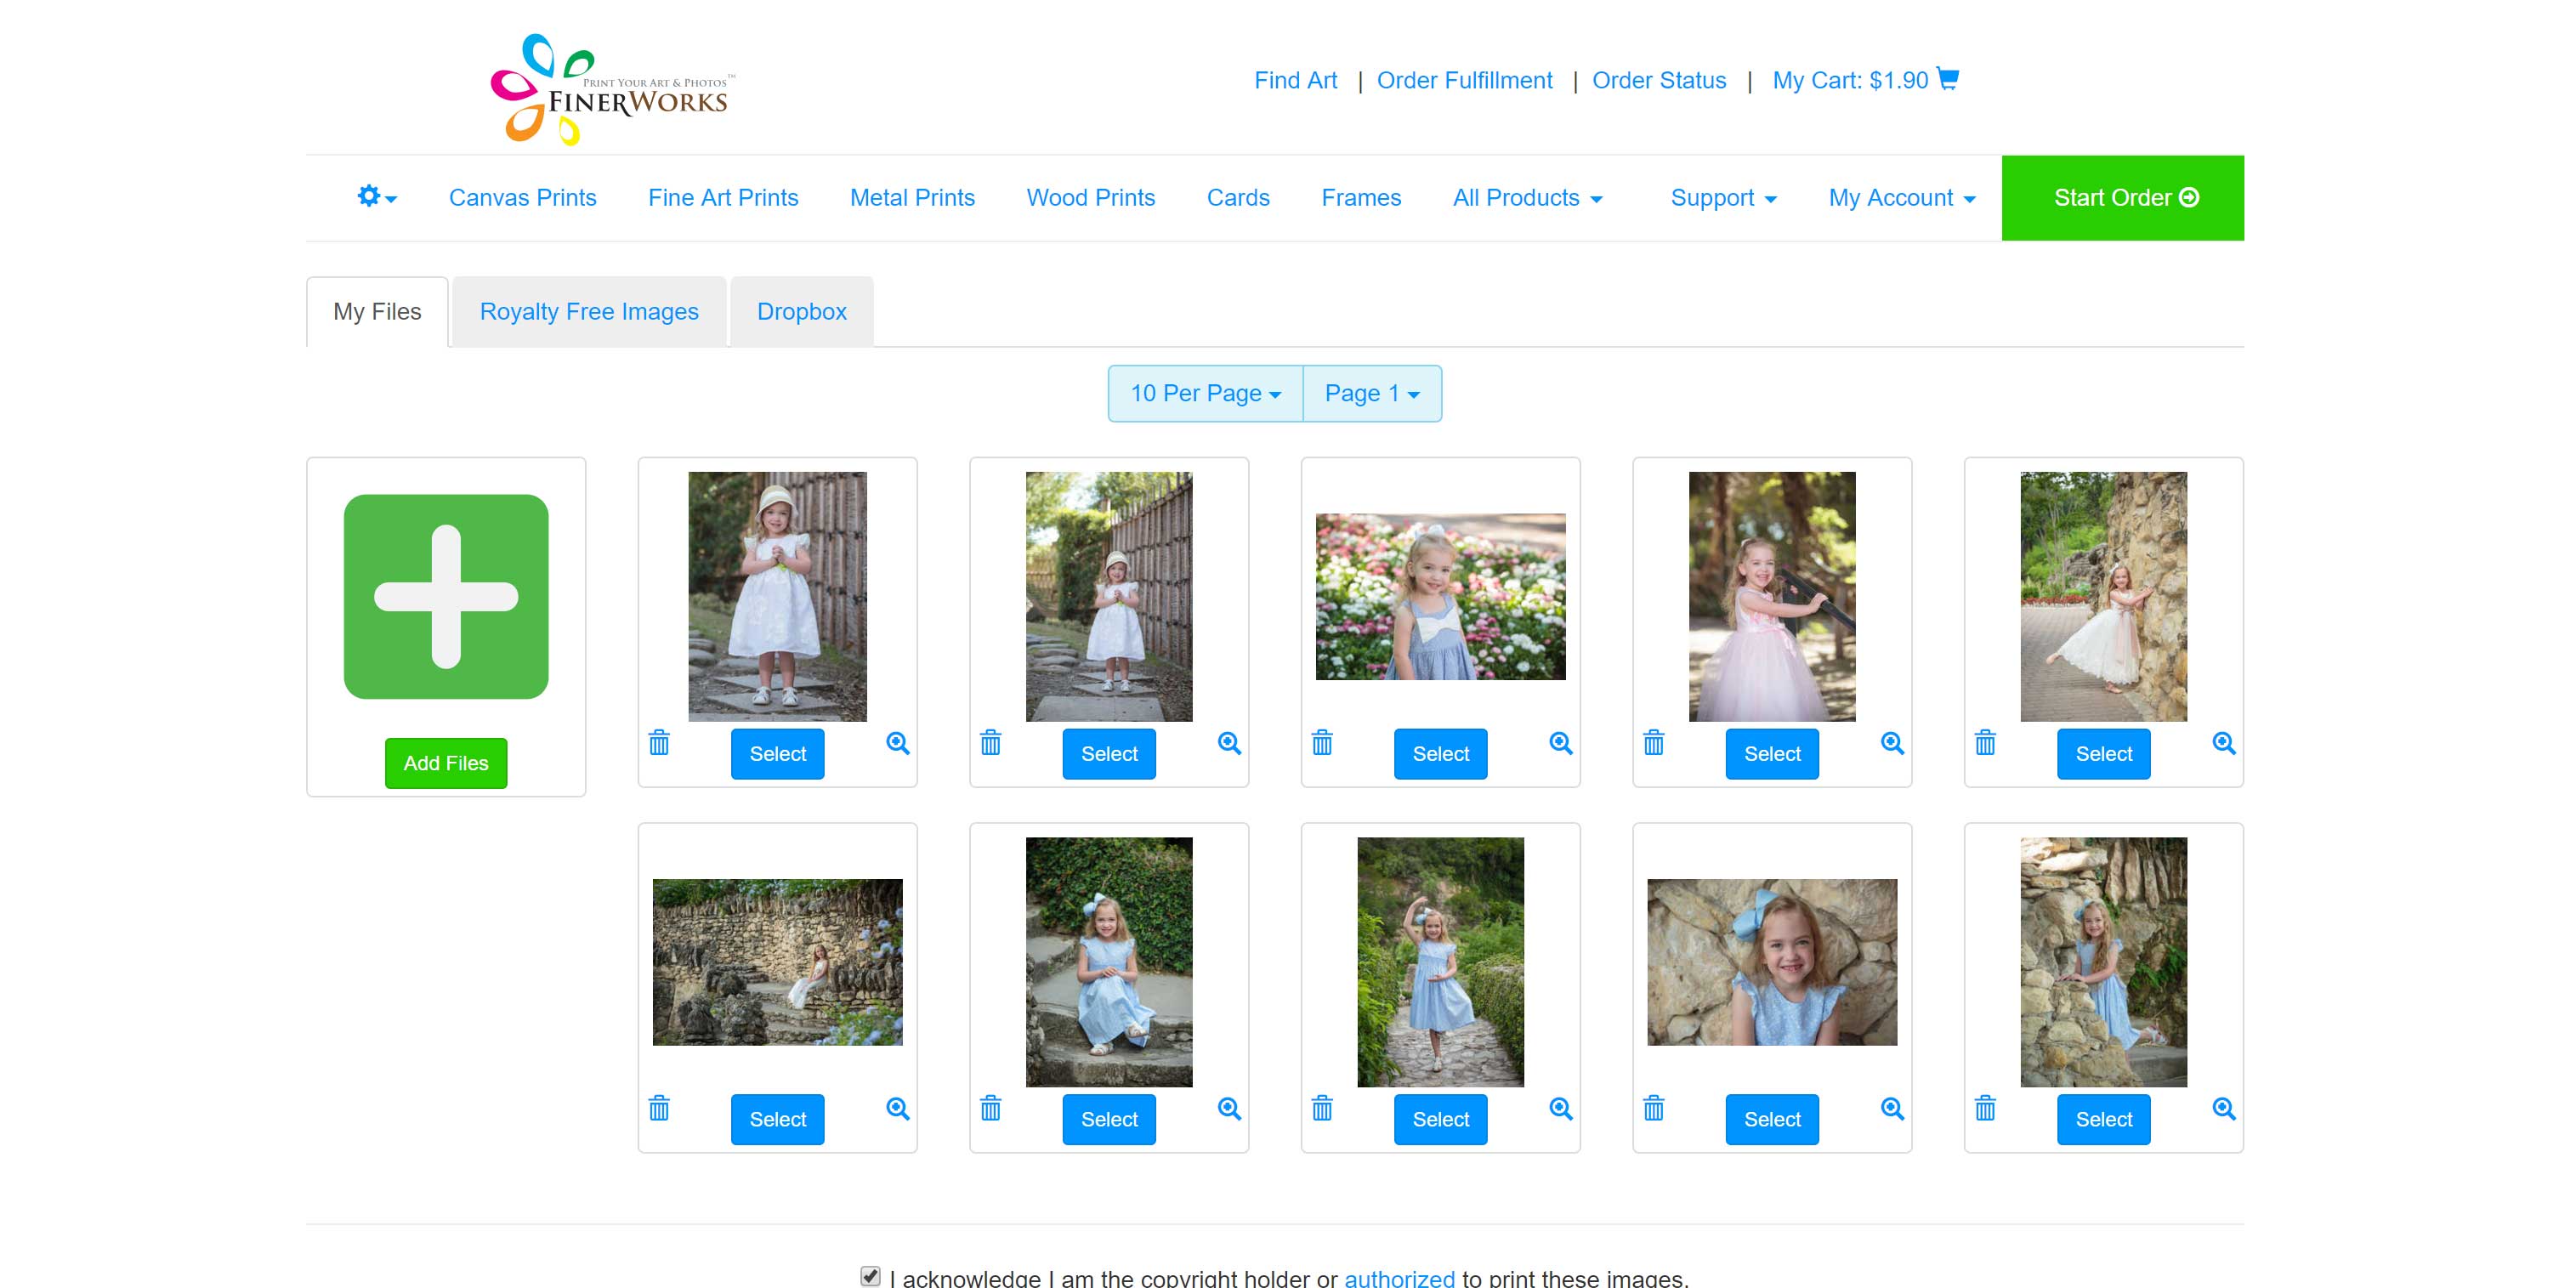
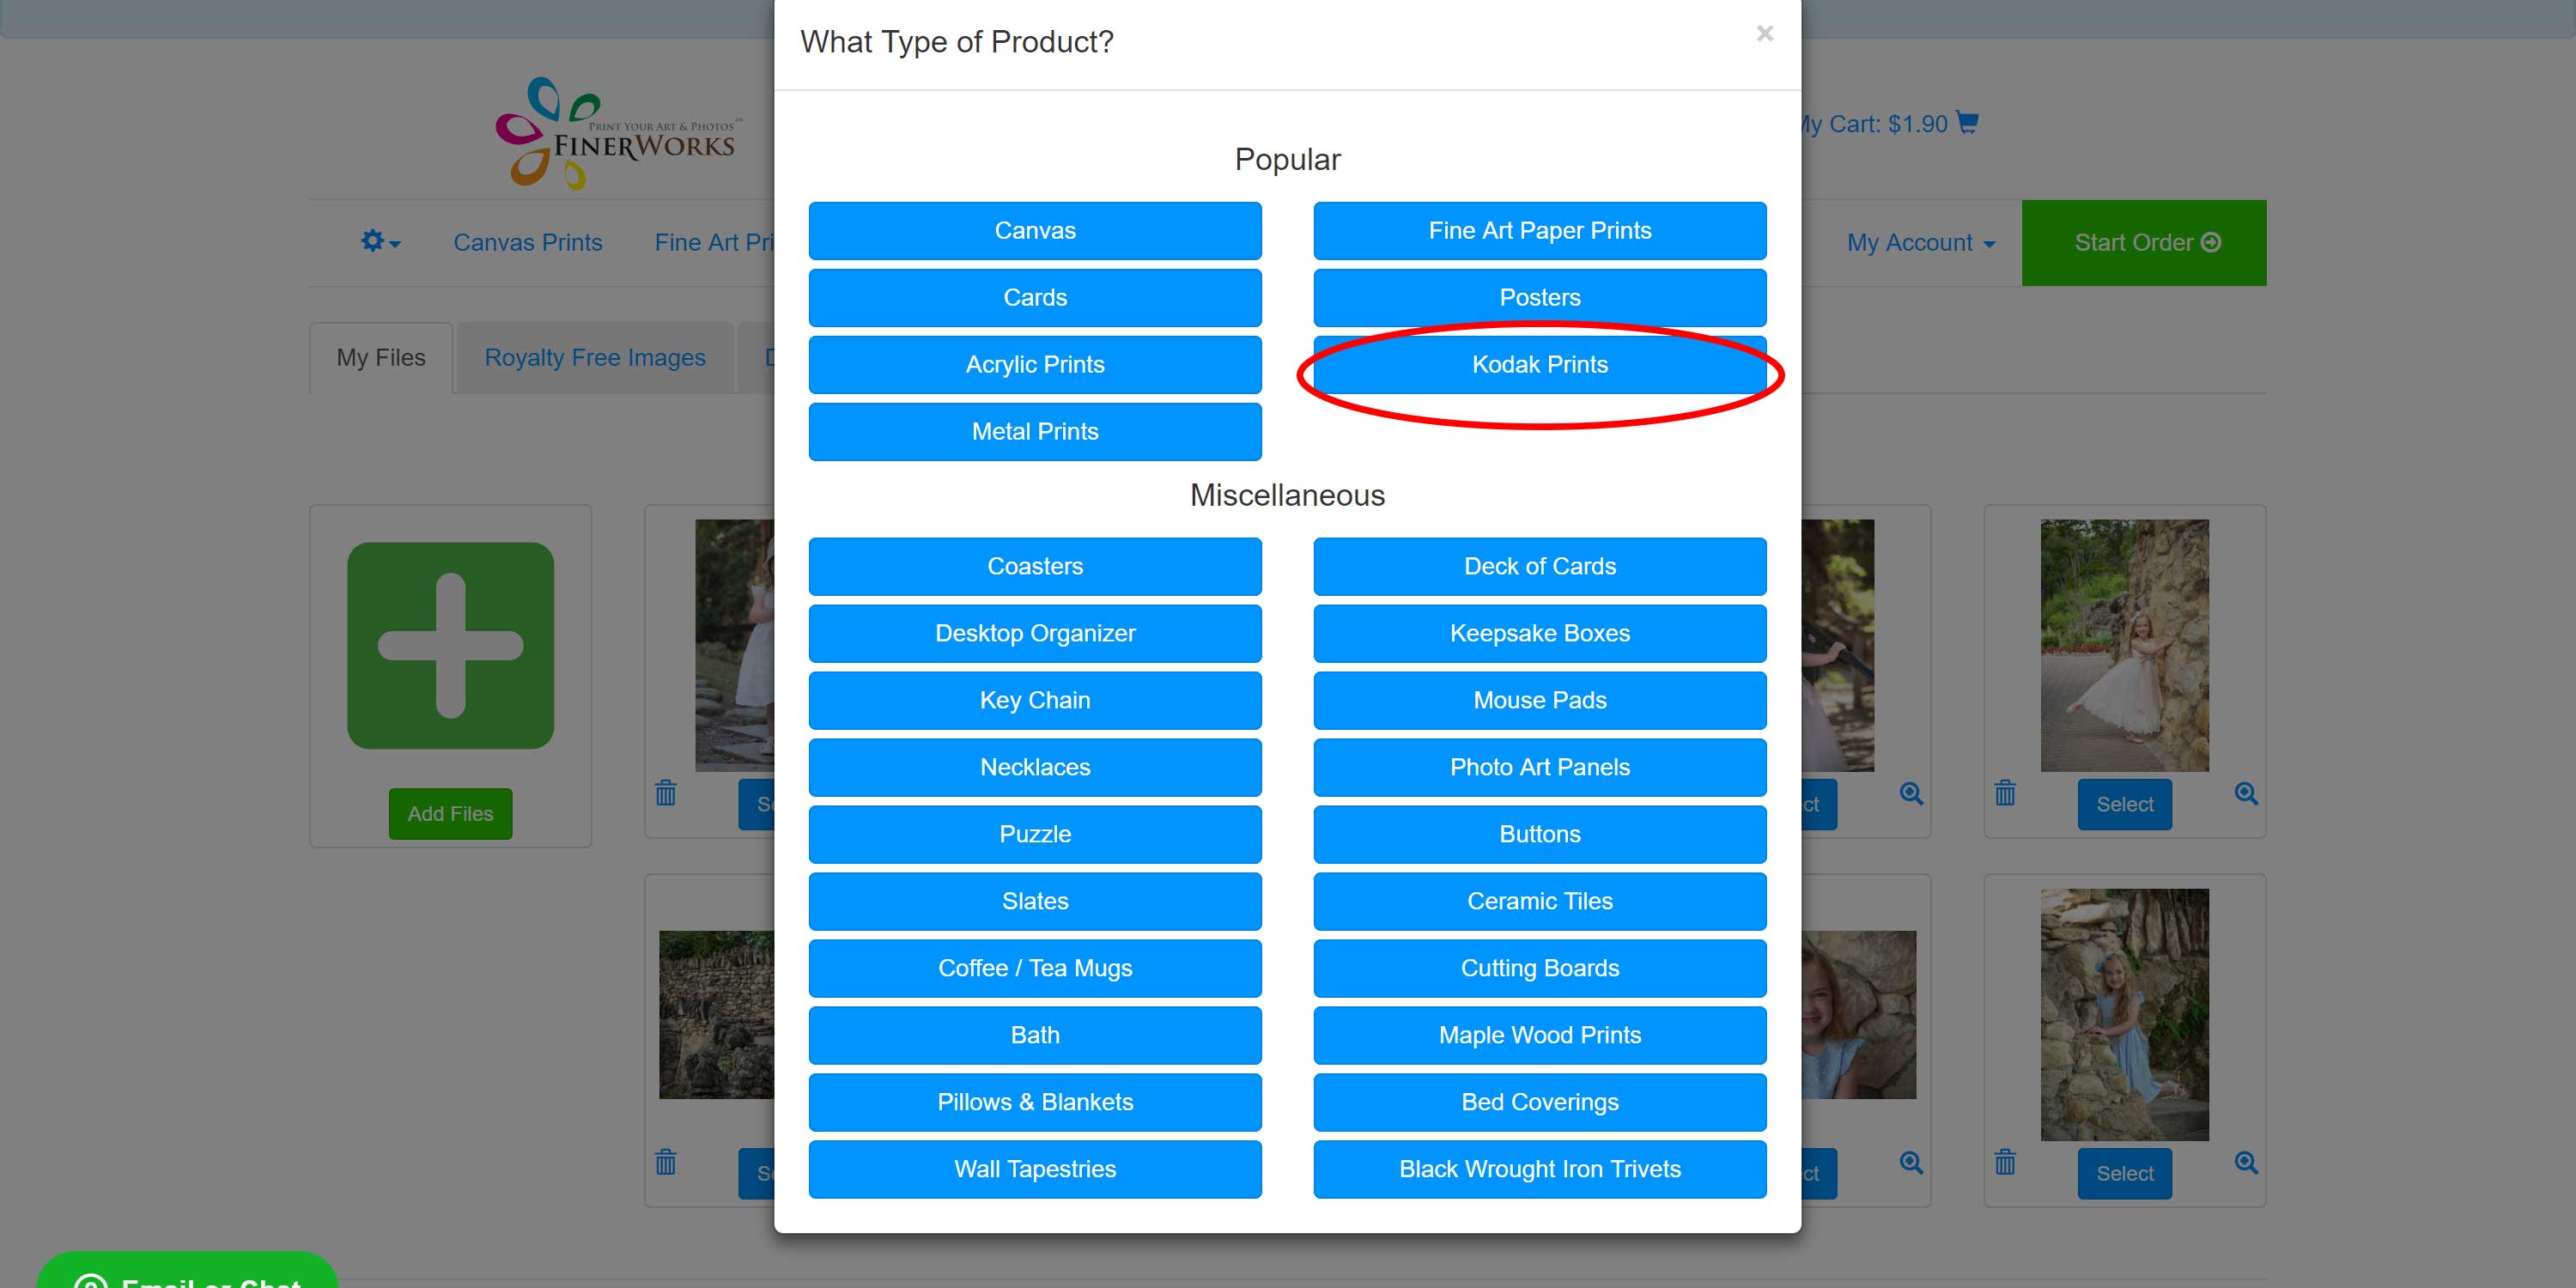
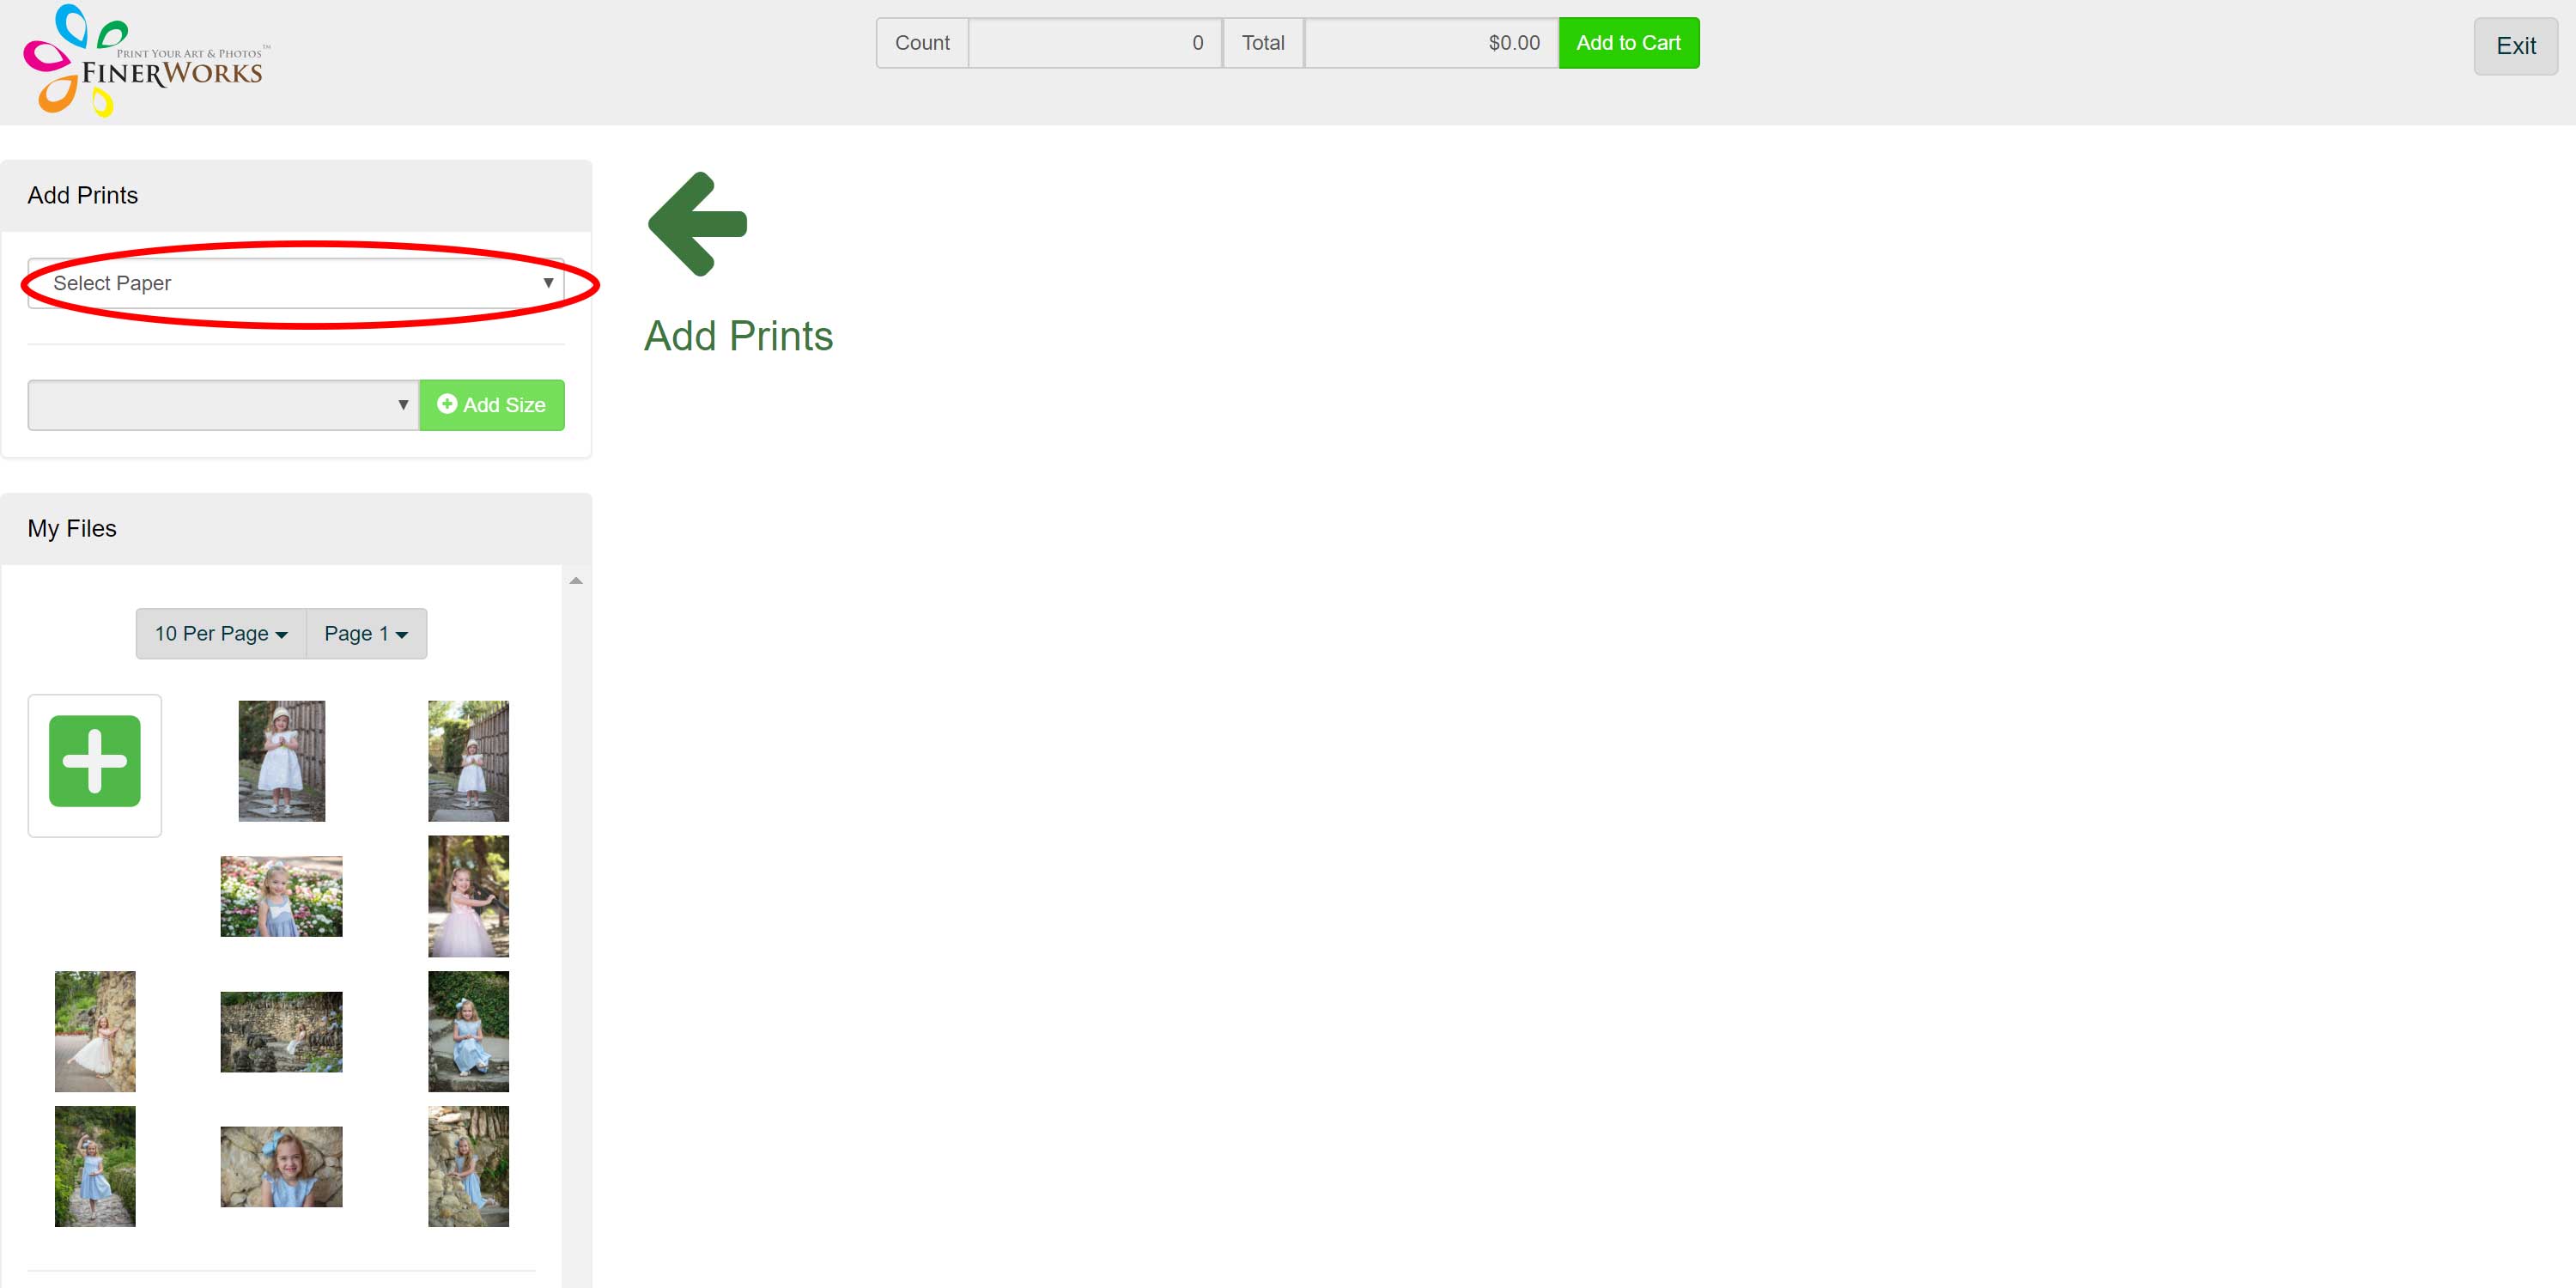
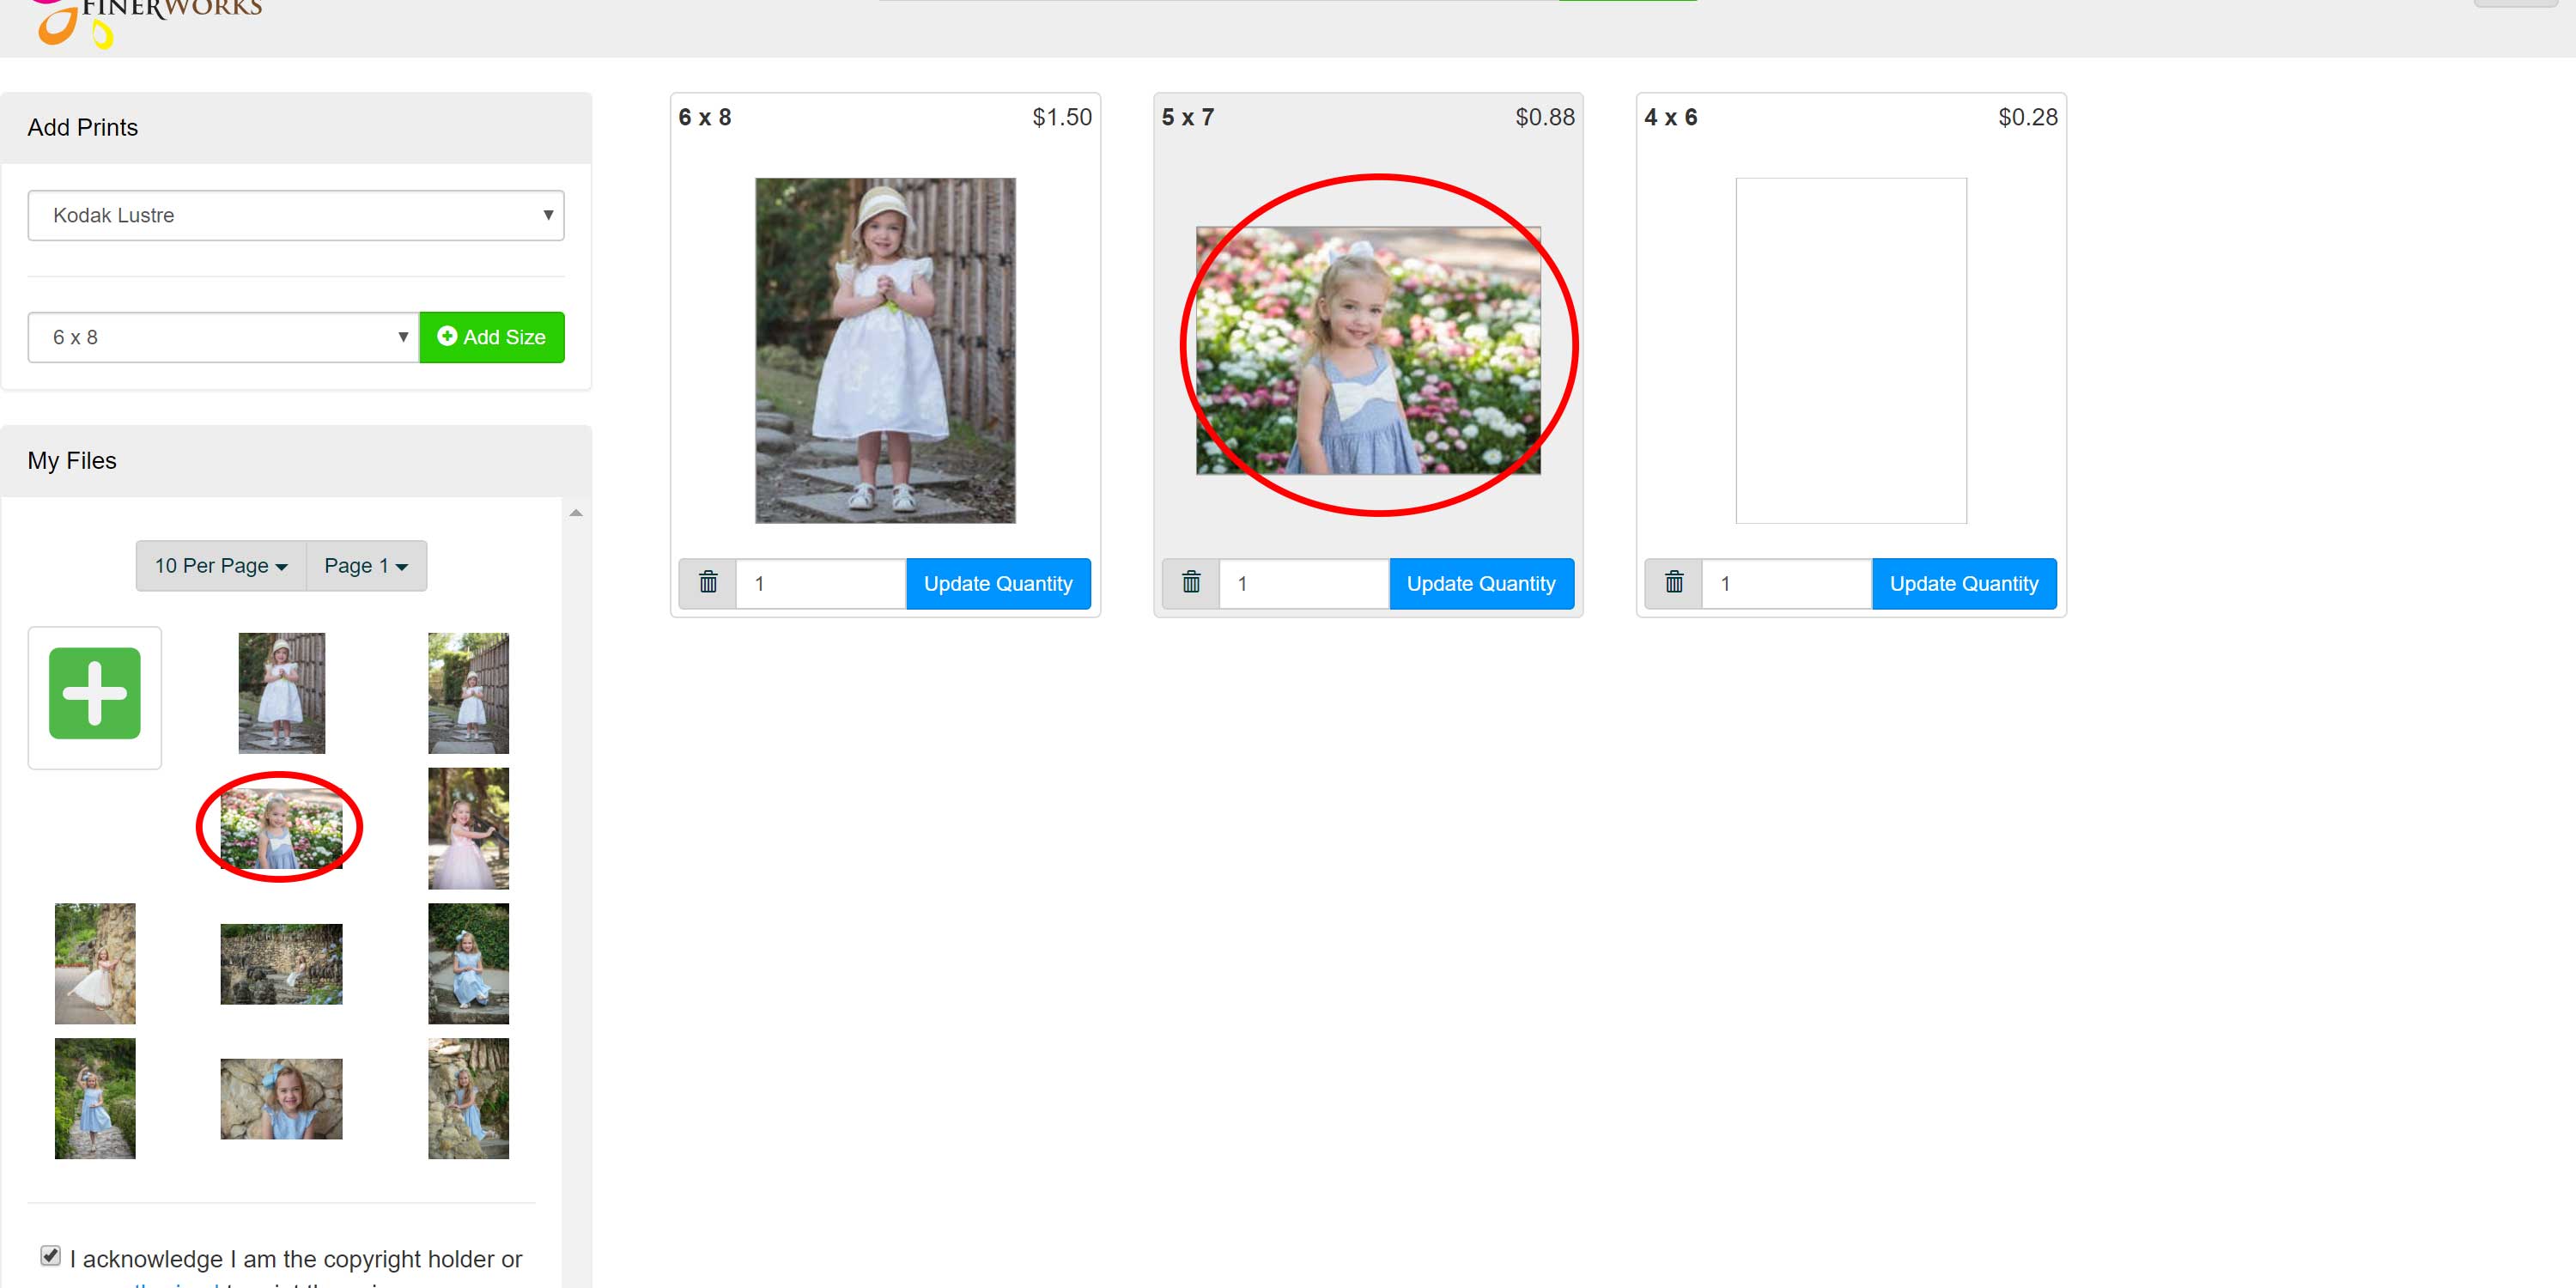
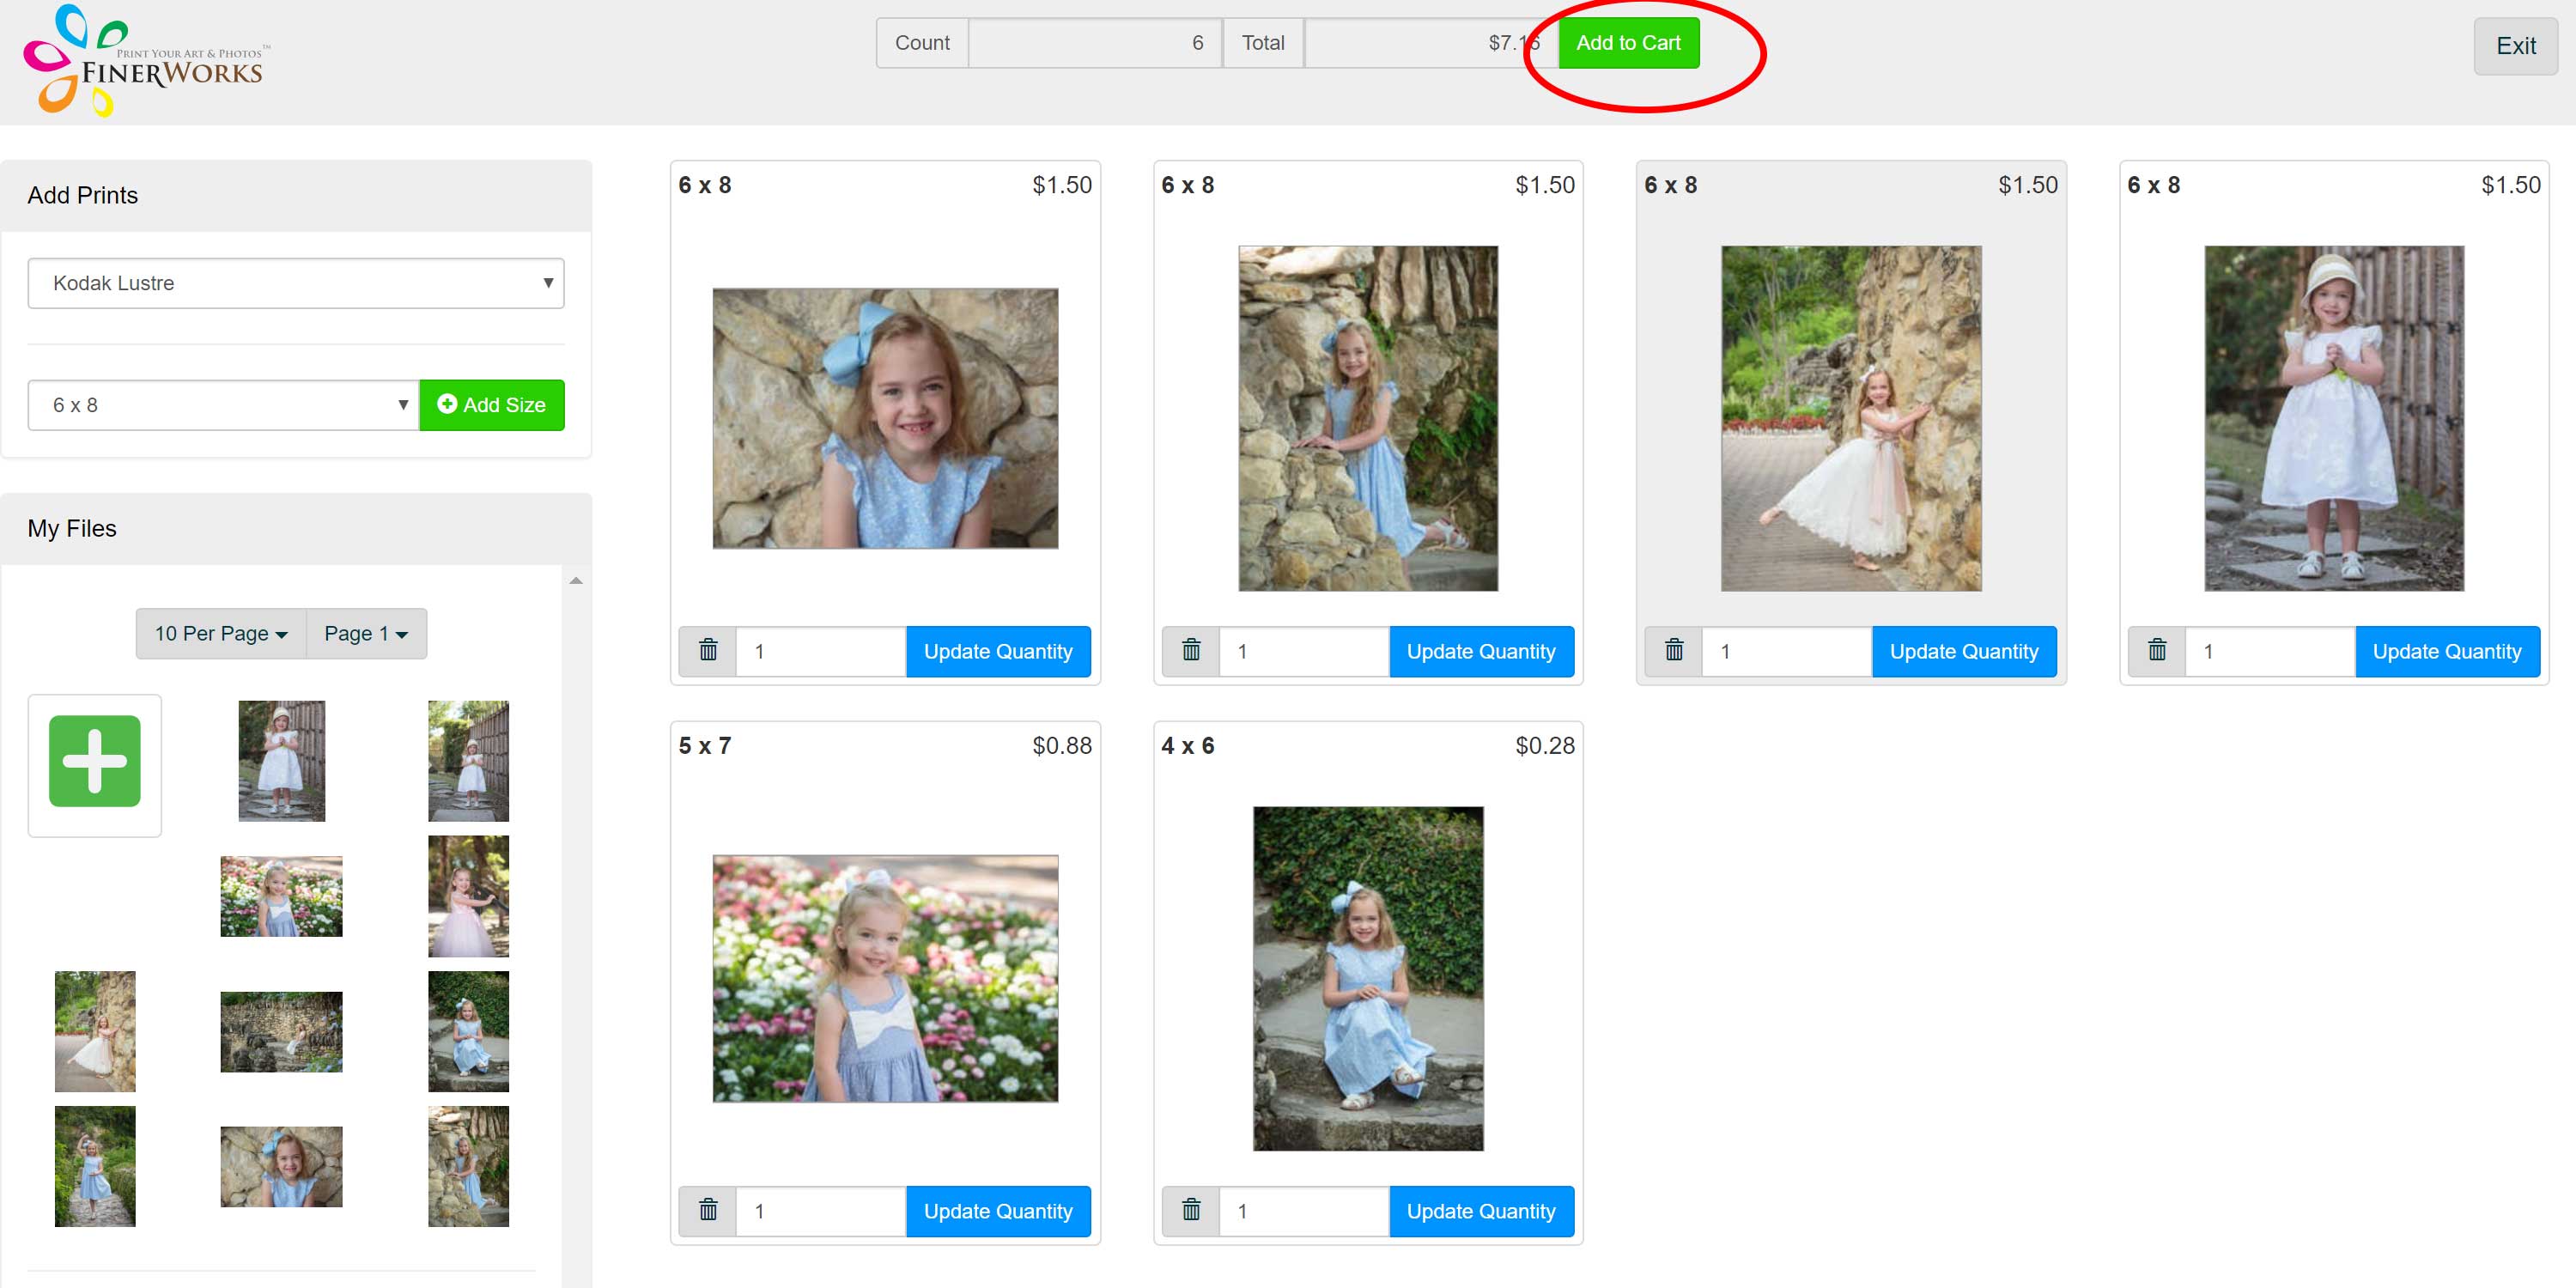
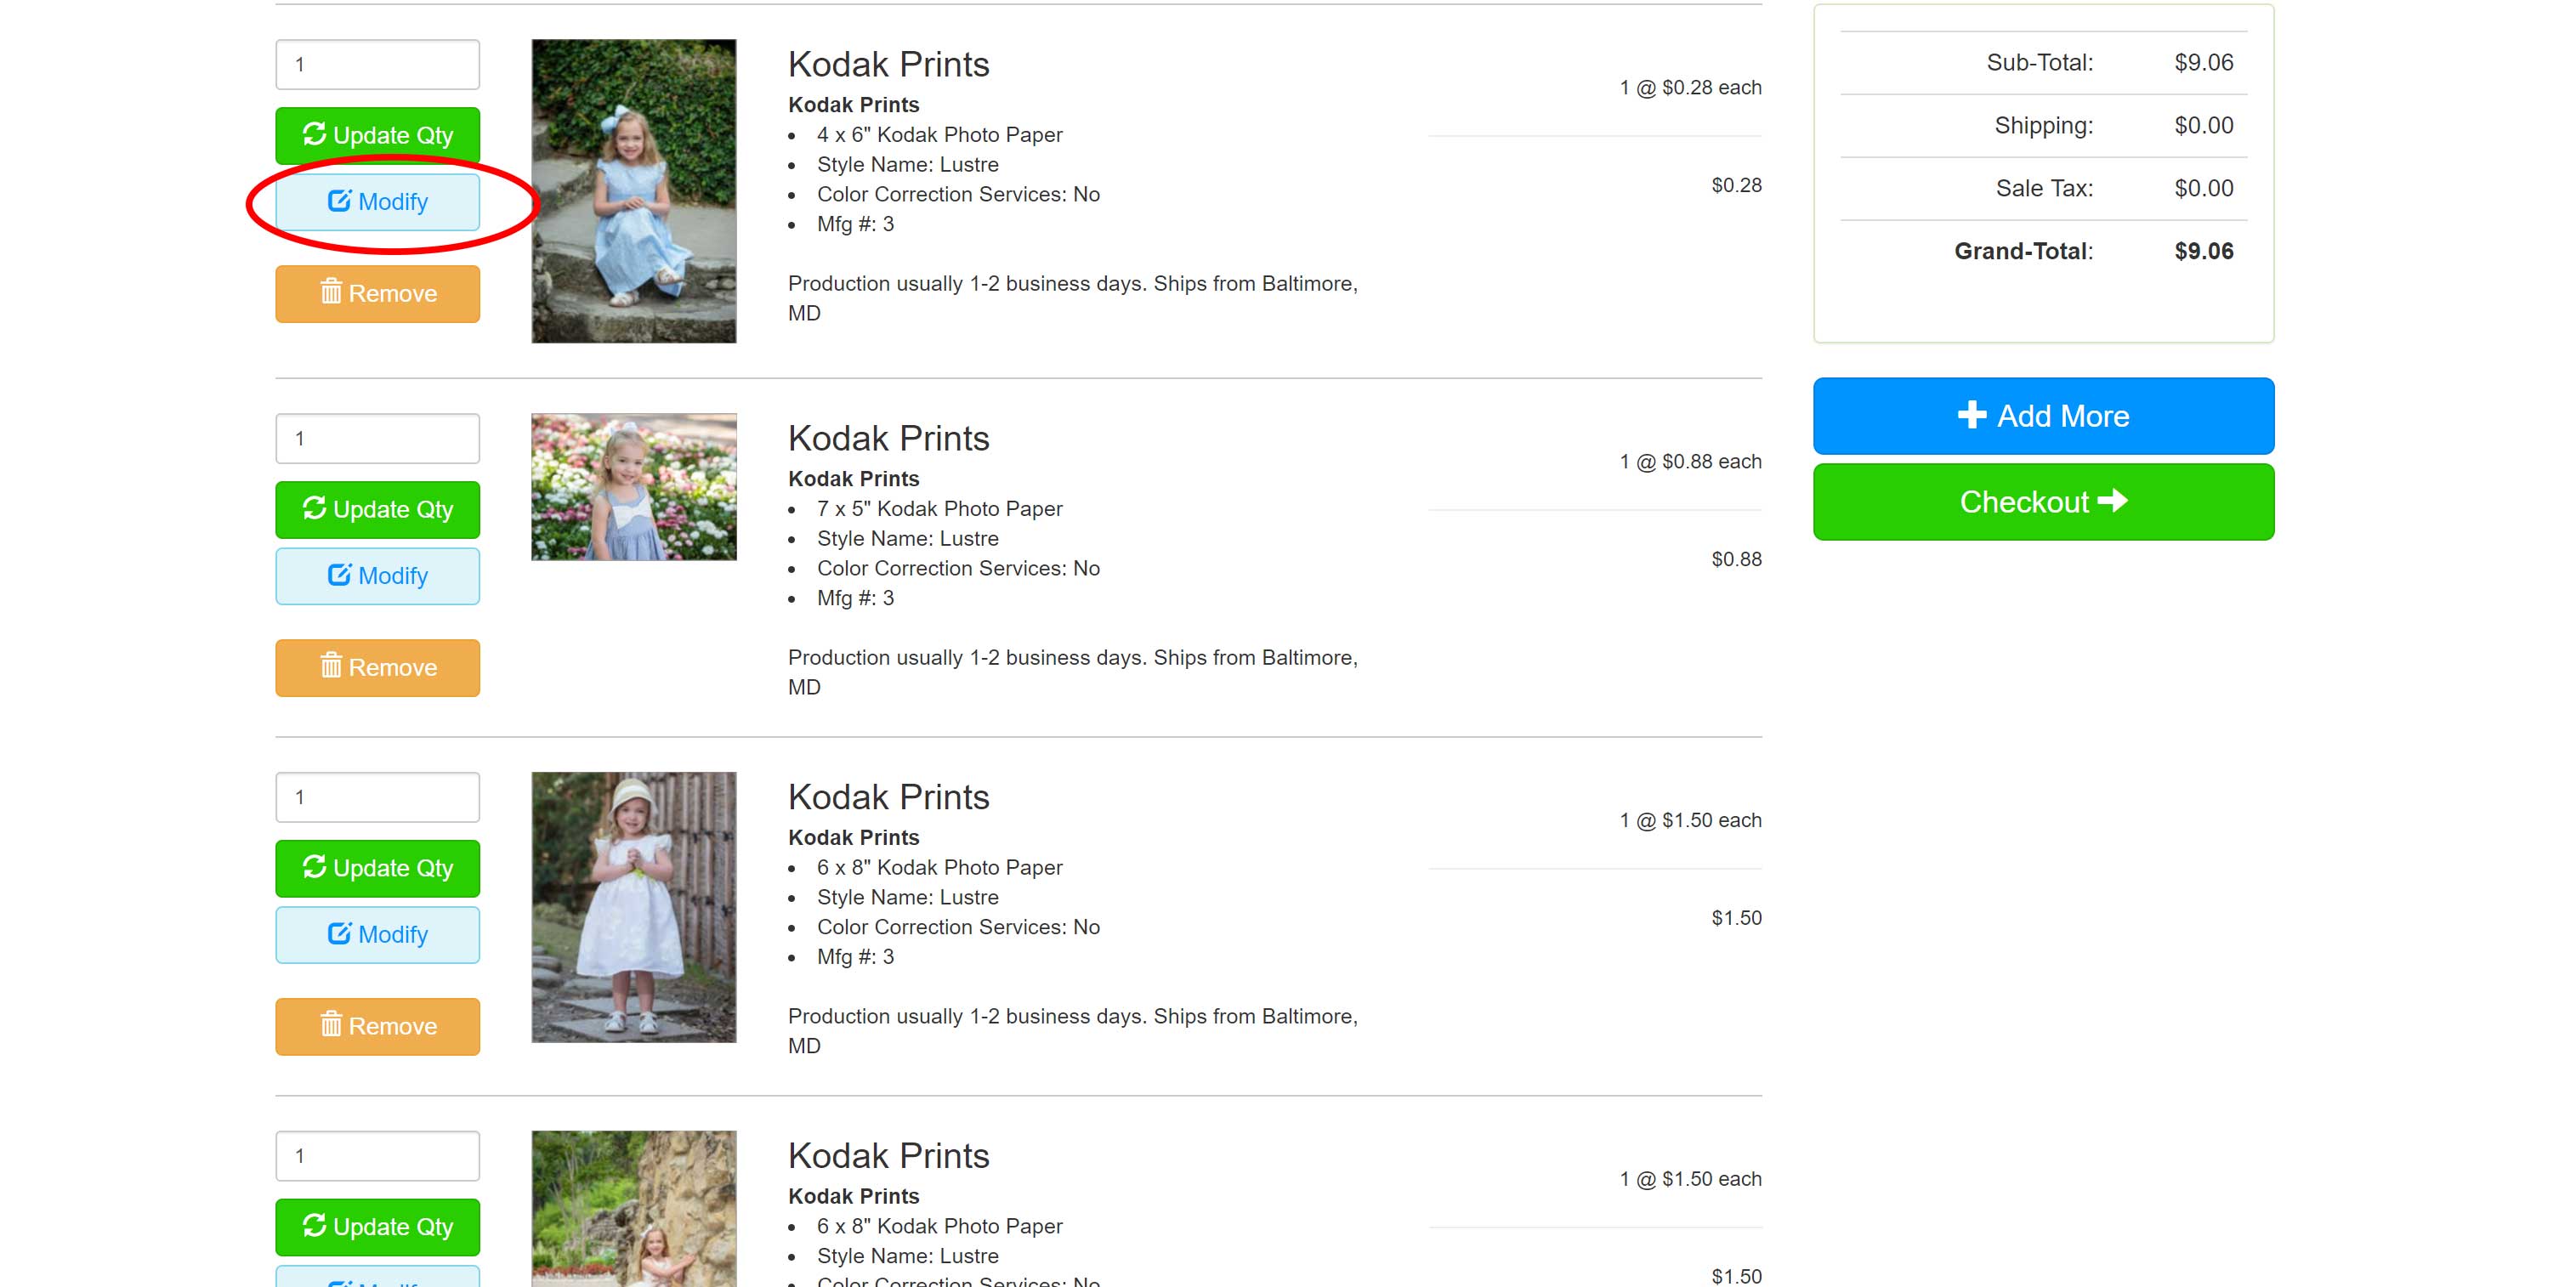
Pull up your images by clicking the start order button on any page. If you don’t have any images uploaded yet, click the green plus sign to select your files.Choose the Kodak Prints from the different categories.When prompted choose the green batch ordering tool button, otherwise you can opt to use the regular ordering interface which is recommended if you want more control on how the image is to be cropped and/or want to mat and frame your print.Now that you are on the batch tool screen, choose the paper type you want.Now choose the size you want your print to be and click the green button to add that size. Add as many as you want or even choose a paper type and size.This is where it is tricky (not really). Click one of the blank prints you added to select it. Then click one of your thumbnail images. That will apply the image to the blank print.Once you have added all the prints you want, click the Add to Cart button.If you need to modify a print, click the Modify button in your shopping cart view. This will take you to the regular interface where you can make changes to that print or even add a frame and matting. Otherwise you can checkout.
Right now, the batch print tool is only available for Kodak prints which are unframed or matted. If you wish to adjust the crop positioning, frame or matte any of the prints, click the “modify” button AFTER you have added it to your shopping cart.
Feel free to share any comments or suggestions for this tool.
James Theopistos
James Theopistos is the founder of FinerWorks, a print fulfillment company that has been in business for over 20 years. FinerWorks works with a large number of artists and photographers annually, and James has been noted for his understanding of the craft of printing and the needs of his customers. He has also been a presenter on topics such as strategies for becoming successful in business as an artist.