
At some point you will want to have good digital pictures of your artwork. Aside from assisting in preserving your intellectual property rights and also for insurance purposes, it is a necessary step for good giclee reproductions of your artwork. For many artists, with a large gallery of paintings, the cost of having artwork scanned may be somewhat daunting. Try $500 per painting on average with some places charging even much more. One company I spoke to which was owned by a famous contemporary painter charged close to $20,000 per pience for the setup alone. While scanning may yield a little better results, for a little over that cost, you can purchase a good digital SLR camera. This is why many artists find photographing their artwork a good alternative.
Photographing your artwork does not require any great expertise or talent with the camera. It essentially requires a decent SLR (single lens reflex) camera and a lens that can shoot at 50-55mm, the proper lighting conditions, and proper camera positioning.
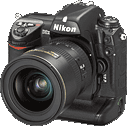 The Camera
The first step is to have a decent SLR (single lens reflex) camera with the ability to the ability to zoom to at least 50-55mm lens. If you have a zoom lens that can shoot even higher (200-300mm), then all the better. At that higher lens setting, you will have be move back further from the painting but that is okay since it flattens out the image better. Keep in mind that if you are not using a camera with a 50mm lens or greater you may get barrel-like distortion or a fish eye effect. A lot of people do not realize that this occurs but it is noticeable when you are shooting artwork due to the typical square or rectangular shape.
You may wonder if you should you use a digital or film based camera. While a few traditionalists may disagree, we prefer to use a Digital SLR and recommend it for the non-photo professional. It simplifies the workflow considerably since it allows you to quickly load your photo onto a computer to assess if any changes need to be made. If so, then you can go back and make the corrections necessary. Overall we have also seen better results from photos of artwork submitted from amateur photographers that shoot their own artwork digitally versus them using film.
With digital, the number of mega pixels of the camera does come into play so we recommend at least a 8 mega pixels Digital SRL camera or greater. Both Nikon and Canon make some popular and fairly affordable consumer based Digital SLRs. If using film based SLR, then you should use the slowest film possible. The slower the better since less graininess will occur. Graininess is a common problem we see from film based images. It can also happen in digital when the lighting conditions are very low but it is less likley.
The Lens and Sharpness of the Shot
Since initially writing this post I have had a lot of people ask about lenses and if your average camera kit lens is good enough. One common complaint I have heard voiced is even on a tripod the photograph is too soft or not sharp enough. This may simply be an instance in which the quality of the lens plays an important role, or you may just need to hone your photography skills in the technical department. Either way it is worth noting the lenses which usually come with your average Canon or Nikon dslr kit are their low end lenses. Serious photographers typically favor premium lenses by those manufacturers since they perform much better than the lower grade versions. I have always liked Tamaron and Sigma as great alternatives to Canon and Nikon. Some would argue they make lenses which compete with Canon's and Nikon's the premium lenses when it comes to photo quality. The other good news is they are around 2/3 to 1/2 the price. Pesonally I would spend some time researching and buying a good quality lenses instead of using relying on those coming with a kit. Do some searches online at various photography forums and search for reviews on camera lenses. If you have a camera shop nearby, visit it and let them know what you need it for and see what they might recommend.
Lighting
Artwork can be shot indoors or outdoors. The main factor to consider is the angle and lighting color. Of course you will want to use a white light source to prevent modifying the color of your artwork but for the low budget photographer, a nice sunny day should work best. Try to photograph in the middle of the day, between 10 AM and 2 PM. Avoid using the flash since it can create hotspots on your painting which appears as light reflecting off your painting. I can't tell you how often we see this and you wonder if the person shooting the photo bothered to review the image before they had us print it. Not to mention it can totally destroy the appearance and the ability of a decent print by hiding details. If you are a little more advanced, experiment with shooting with different settings. I know I mention proper lighting but one thing I have tried and received good results fromn is shooting in RAW mode indoors in a very low light setting and with a longer exposure. Of course you would followup by making adjustments with your camera photo software.
Use a Ruler and a grayscale meter
If you can include a gray scale strip (will have several squares of gray going from white to black) as well as a place ruler above your artwork then you will have some additional referencing tools at your disposal for post photo production. You can create your own grayscale meter or print out this one on a white sheet of paper. Use the ruler for sizing and the grayscale for adjusting your brightness and contrast levels.
| | | | | | |
| A grayscale strip will help you check your pictures balance for brightness and contrast. On your monitor, you should be able to distinguish all the swatches from white to black. Also, the white should all white and black should be all black. | |||||
Taking Photos of Your Paintings
 The angle of your shot is most important. You will want to place your artwork flat against a background or on a wall. Black velvet material is an excellent backdrop since it can absorb light. If a black background is not available, try a white background. You may need to make some color adjustments later to your image in a program like Photoshop. Make sure your artwork is exactly at a 90 degree angle to your camera so that the lens is pointing directly at the picture. The artwork should take up as much of the camera lens view as possible. This can be more difficult then it seems so a tripod may help if you have one. Avoid using a flash since this may cause glare to appear on your picture. It may take several shots before you are satisfied. This is where the digital is most advantageous because you can shoot an image and preview immediately afterwards on your computer or camera’s LCD screen. Very important to note is that if shooting digitally, use you camera’s highest quality settings and resolution. If you have the option to shoot in RAW or TIF, use these formats over JPEG.
Other factors that you will need to consider and consult your owners manual on is, white balance, aperture and exposure levels since they can affect the quality of the picture. Most new Digital SLR cameras have modes that automatically detect these but it will not hurt to become familiar with them anyway.
Post Photo Production
Once you have photographed your artwork, open up the file with a good image editing program like Photoshop or Paint Shop Pro. If you are using film, you will want to scan the negatives or have a transparency made and scan them. Do not have your local photo processing place make a photo CD unless they can do so at a high resolution – 200 to 300 pixels per inch (PPI) in relation to the size of your artwork is best. Once you have opened your image file you may need to do additional resizing and cropping. Use the ruler and grayscale you included in the photo to make adjustments accordingly.
This is very important. Make sure that you carefully examine every inch of your photograph by zooming in so that the ruler you included matches an actual ruler size when held up to your monitor. Check the quality of your image at this zoomed in level. If you have too much pixelation, graininess or the image is too blurry, reshoot your image at a higher resolution or with different settings. This is where we have seen many artists drop the ball. All too often they do not perform this step and assume because it looks decent on their computer when first loaded, it will print well.
If you are using our printing service and your are photographing your artwork, keep in mind that it is your responsibility to ensure your image file is good for printing. Our system print's what it gets through a remote and automated system. The staff that receives the print may not be able to go back and judge your image file for its quality.
If you are not familiar with this end of things, you may have to seek the assistance of a professional or someone at least well versed in digital imaging. After adjusting color and size you will need to crop excess parts of your photo outside of the range of the artwork so that your final copy is just of the picture. You may need to resize up or down. If resizing up, do so in increments of 110% and in bicubic resample mode. This better preserves the resolution quality then sizing up in one step. Your final resolution should be 200 to 300 PPI. Many professional printers recommend 300 pixels per inch but realistically at 200 PPI there will not be a noticeable difference. If printing on canvas, even 150 PPI yields excellent results. It is very important to note that the more you have to resize up, the greater the loss of quality occurs in the image. Hopefully you will be able to start off with a high resolution image in the first place.
Additional Things to Consider
The big advantage to doing this digitally is that you can get instant results from your photography session. With film you have to have it developed and then see if you did it correctly. This can be frustrating for the amateur photographer since they may find that all their shots were off in some form or fashion. If you do not have a good DSLR then purchasing one may set you back more than a film based camera so it may be more cost effective to use a film based camera. You will need to purchase a scanner that can scan negatives, slides, or transparencies.
Conclusion
Keep in mind these instructions are meant as tips to get you started and the final results may vary from individual to individual. You may find certain things mentioned do not work well for you. If you are just getting started, use this as a starting point then tweak your technique as you go along. Once you are able to start capturing your original works digitally for archiving and printing you will be able to easier print these images on demand.