
A lot of our customers choose to ship their prints themselves, especially if they are taking advantage of built-in volume discounts on prints. It is not uncommon for them when they are first getting started to ask for advice or tips relating to best practices when packaging unframed prints.
Determining how to sufficiently protect your prints is the primary goal. Prints by their nature create an interesting dimensional dilemma when it comes to suitable packaging so finding the ideal packaging solution may be difficult in some cases, especially with prints of various aspect ratios. Just go to your nearest office supply store and look at the shipping supplies they have on the shelf for you to purchase. You will notice is most of the parcel packaging options are boxes for 3-dimensional objects. Your typical small print order is going to be very 2 dimensional. This means your ideal options are going to be to use a rigid flat mailer or a shipping tube. Both have some great advantages but they both also offer some disadvantages as well. So, we will take a look at both in detail and perhaps you will decide which is ideal for you.
Using Rigid Flat Mailers
Let us look at flat rigid mailers first. Generally, they are going to be constructed from rigid card-like stock. Their purpose is to allow you to ship photos and other documents that you want to arrive flat and not bent or curled. In my opinion, they do not provide the best protection without some help. Unless your prints are a few small photos, they need to be reinforced, so the mailer is able to better handle the stress of shipping.
To decrease the chance the package will get damaged, we have had great success at FinerWorks by sandwiching prints between two sheets of corrugated cardboard and placing them in the rigid mailer. This has worked out well with flat mailers up to 17×21”. To help protect the prints further, we will place them in a single clear bag. Occasionally we will use multiple clear bags if but we need to be careful since multiple clear bags with prints on them do not stack on top of each other very well and can actually cause indentions in the prints underneath them as well as create air pockets.
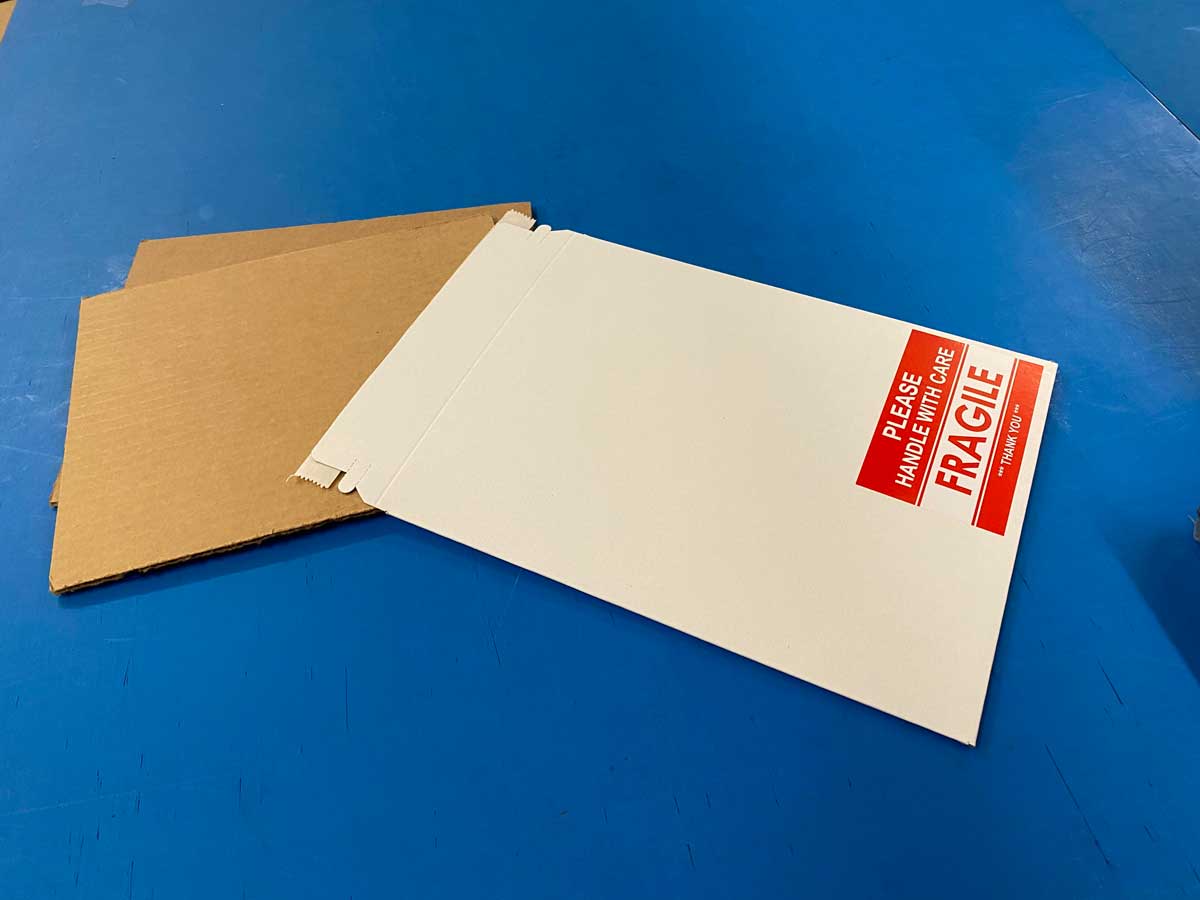
Self-sealed mailers as we use are going to cost a little more but will look a lot nicer which is important as we will discuss below when talking about customer perception.
If you have trouble finding flat mailers you like, you can easily construct your own. Buy some large manilla envelopes and use three sheets of corrugation for rigidity. I know of some people that will use up to 4 sheets of cardboard total for an incredibly sturdy mailer.
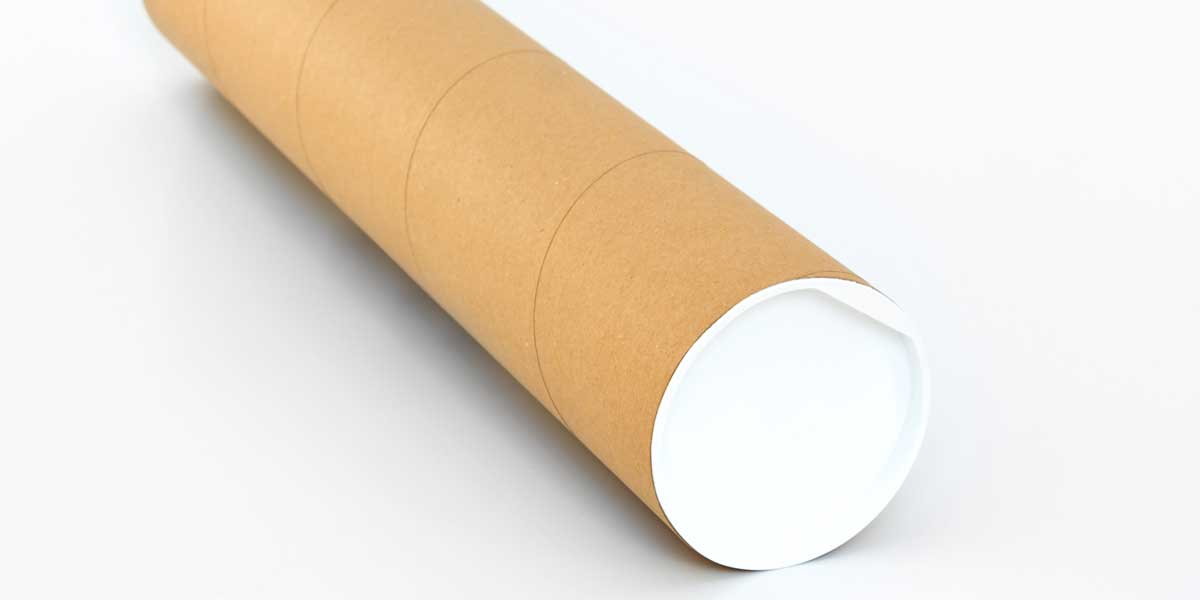
Using Shipping Tubes
Many of our customers may not be comfortable with using a flat mailer or are shipping larger prints, in which case consider using a shipping tube. As you read further below, there is some good reasoning behind this. Packaging may seem relatively simple. Just roll it up and place it in a tube, Right? DO NOT package it that way. Instead center it face down on a sheet of Kraft paper at least 2 or more inches larger than the print on all sides. THEN you roll it up.
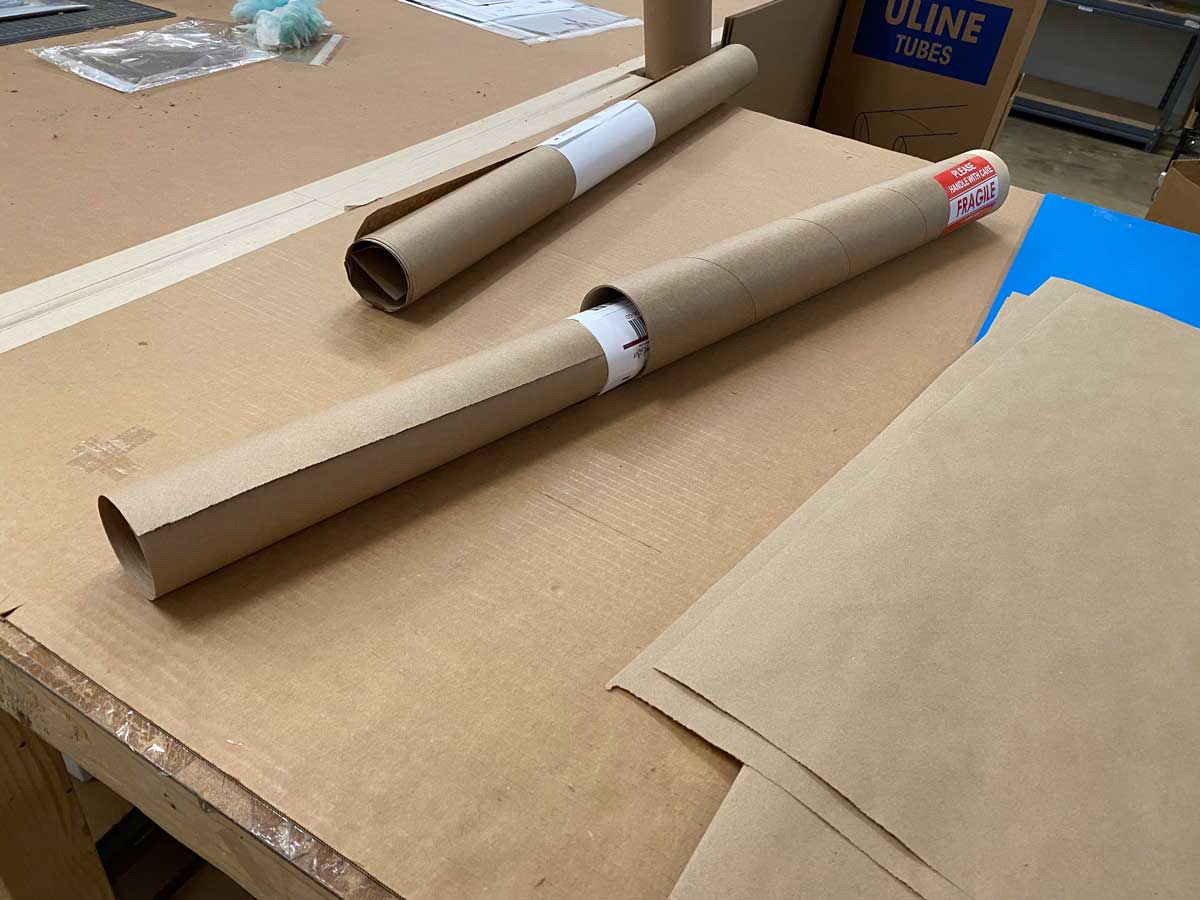
The 2 or more inches are especially important since they will act as cushioning, so the edges of the print are less likely to be damaged or crimped when the tube gets dropped on one end. Instead, the Kraft paper takes the brunt of the force. You can also consider stuffing the ends with bubble wrap or more Kraft paper if you have room and feel it is necessary.
At FinerWorks we normally also place the prints in a single clear bag. In this case, we usually leave the bag unsealed so that when rolling it up, air can escape the bag. It is not a good idea to use multiple bags since they do not roll up well when over each and can easily slide around.
I recommend tubes with a diameter of at least 3 inches but go wider if you can afford it. One reason we say 3 inches is because that is also the diameter of the core of the rolls for most of the fine art papers we use. Also, any smaller and it becomes difficult to flatten out the print since it had to be rolled very tightly. Try not to roll too many prints together in one tube. That too may require you to roll it relatively tighter. It is hard to describe without seeing, but you want the print rolled just tight enough to keep it in place in the Kraft paper but not too tight that it is hard to flatten out. Most shipping tube options you find will have caps so make sure you tape these well unless you are placing the tube in another outer package.
How Price is Affected
Choosing a flat mailer or a tube will affect your cost. Take for instance a 12×18 print. To safely ship it flat, we contain it in the 17×21 flat mailer I mentioned above. Alternatively, you could ship it in a shipping tube that is only 16 inches long. But be aware that the same 17×21 will be too heavy for first-class mail so if you were to go that route you would easily pay $10 plus to ship it anywhere in the U.S. If shipped in a tube, that same print might qualify for first class mail and be substantially less.
Package & Customer Perception
Do not forget customer perception. This you cannot fully control but you can improve the odds it will be in your favor. One of the things easily overlooked is the appearance of the packaging and the condition in which it arrives. How it looks contributes to the perception of the print’s quality. You can ship the highest end most expensive print imaginable but if you package it with duct tape and left-over packaging material from your recent Amazon order, there is a good chance the customer will subconsciously assign their initial perception of package quality to the print. This in turn will diminish its value in their mind.
More often than not, when a print is ordered and shipped from the majority of color labs, they are shipped in a shipping tube. This is good news for those more budget conscious since it will not surprise the recipient. The bad news is the print is harder to flatten out, especially on thicker papers that are not cotton based since they are less pliable. This is not a new dilemma. Any professional frame shop is used to this and may even have tools designed to help undo this problem. These include weighted bean bags that you place on top of the prints to rollers that you use to roll the print in the opposite direction of the curl. The simple solution is to place the prints back in the plastic bag and place a heavy book on top of them. Usually, after a few days, you will see improvement and they become more manageable and can be easily matted or framed. Also, keep them in a warm environment. Cold prints take longer to flatten out.
Personally, I usually recommend shipping a print flat if customer perception is more important to you than the cost. Usually, the default paper curl the print had when it was still on a roll of paper will usually have flattened out considerably by the time the customer gets it, and it is easier to handle. Ultimately the customer will not have a negative experience of having to deal with a print that wants to curl, therefore the overall experience will likely be less negative.
As for the condition it arrives in, you will not have as much control. Obviously, a well-packaged print usually means it is less likely to become damaged, but the package will experience its fair share of dings and scratches. Usually, this means a dirty mailer or shipping tube. To offset the customer’s potential for having a negative experience, consider packaging the package. This not only keeps your initial package pristine but also enhances the perceived value of the print. With flat mailers, it is relatively easy. Simply place it in a slightly larger manilla envelope. Both USPS, UPS, and FedEx have triangular boxes made specifically for shipping items like prints. They don’t do a good job of protecting rolled prints by themselves, but they will protect a regular shipping tube quite well.
A downside to packaging your package flat is it will increase the shipping cost both from a materials perspective as well as postage. But if your profit from the print supports doing so, you may consider it since it will improve the customer experience which in turn increases the chance that customer orders from you again.
Another trade-off between shipping in a tube and shipping prints flat is a flat mailer is likely to get damaged during shipping. And the larger the flat shipment, the odds of this happening go up. It is still rare but something to consider.
Final Tips
For some additional tips, consider using fragile or do not bend stickers. Statistically, they will not help prevent damage but they do show your customer that you are taking precautions to protect the print. Again, customer perception is important.
Be ready to expect some criticism from your customer no matter how you ship it. There will always be those who that complain you should have shipped it flat when you ship in a tube as well as those that will say you should have shipped it in a tube. One way to help offset the cost and prevent these types of complaints is to offer a default tube-based shipping option and an upgraded flat rigid mailer option. This way you clearly leave it up to the customer.
Lastly, going to the local office supply store every few days will quickly add up and you could easily find yourself spending twice as much on packaging supplies. Instead, invest in packaging materials, mailers, or tubes in bulk. A good place to do this is at Uline.com. They sell to everyone from small home-based businesses to large corporations. With online suppliers like them, you will find a lot more options at a lower cost.
Be sure to read the next part of this article in “Packaging Prints – Part 2” which explores shipping larger bulkier items such as stretched and mounted canvas or framed prints.
Wonderful tips! Thank you for providing useful tips for packaging. I always find myself looking up how to ship my fine art prints that are available at AngyPaints.etsy.com. I like that you included the customers perception about the packaging. My main concern was to get it there as safe as possible but didn’t keep in mind the way it looks to a customer.
Unfortunately, my experience is that Finer Works did NOT have great success noted in above article by shipping product the print sandwiched between two sheets of corrugated cardboard and placing in a 17×21”Rigid Flat Mailers .My first print shipment done this way was damaged. A 2nd print was done and again shipped this way with result of damage but was at least in the latter shipment was usable.
Hi Ginny,
Thank you for your feedback. I am sorry to hear that. While its not unheard of for a recipient to have two orders in a row damaged its actually quite rare. Current rates of damage on the 17×21 is roughly 2%. Because this higher percentage and to help lower the cost was one of the reasons we brought back the tube shipping 4 or 5 years ago. There are ways to reinforce and protect a print shipping flat better but for most people, the cost is going to be too high. Its always a balancing act for most artists shipping their prints and even us, to accommodate the larger size with cost. But as mentioned in the article, sometimes that warrants the extra cost.